(Very) Basic Elastic SIEM Set up
Recently Elastic announced the release of a SIEM product. In this post I'm going to do a very basic set up and brief overview of the product.
Some caveats first
I usually set up ELK in lab environment, so this post doesn't cover any security settings for ELK
I don't use ELK day-to-day so there's probably a bunch of stuff that can be done differently / more effectively
With that out of the way, let's dive in:
The first thing you need to do is install Elastic and Kibana. If you follow the official guide, the links take you to version 8.0 alpha, at time of writing these links seem to be broken and my setup is with version 7.2
For my setup, I'm installing Elastic and Kibana on an Ubuntu 18.04 box, and some beats packages on a few Windows hosts.
To get Elastic on Ubuntu: https://www.elastic.co/guide/en/elasticsearch/reference/current/deb.html
To get Kibana on Ubuntu: https://www.elastic.co/guide/en/kibana/current/deb.html
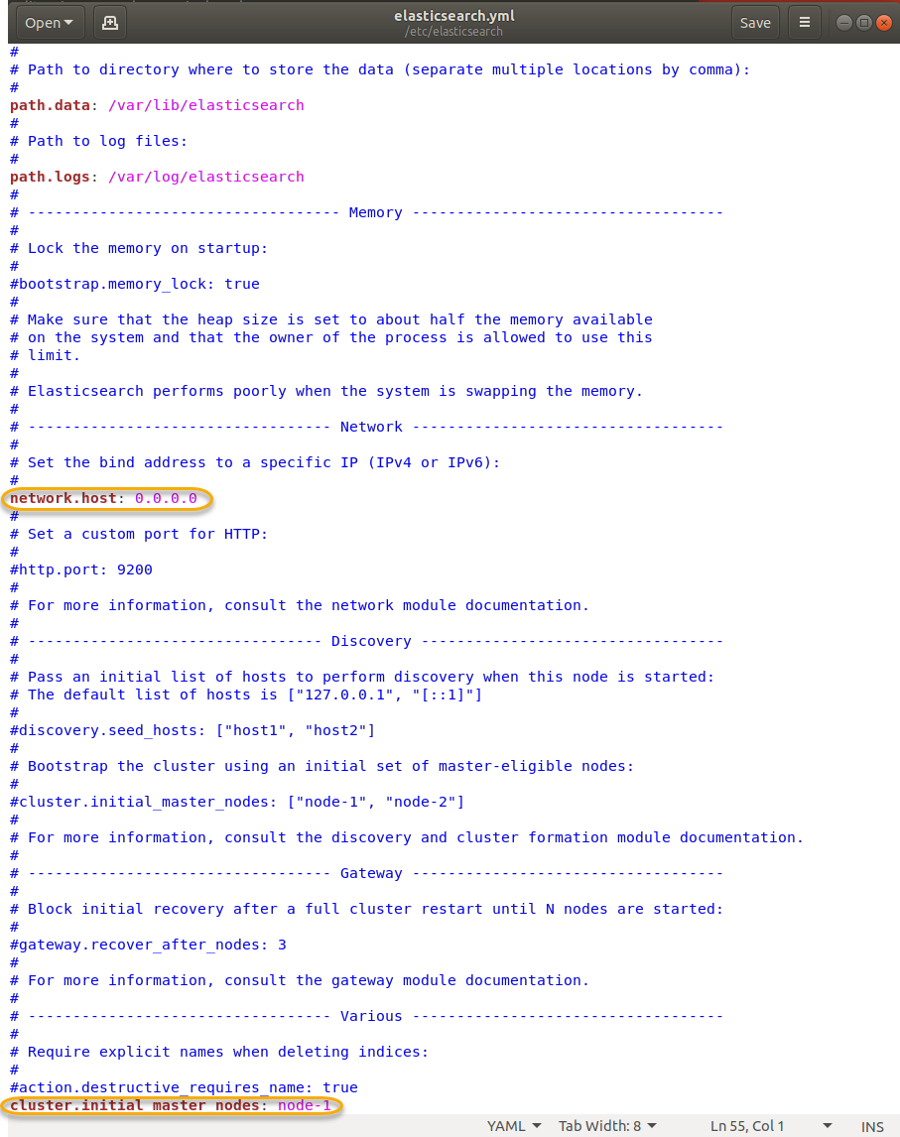
Once Elastic and Kibana are installed, a few tweaks to the Elastic config were needed:
Without the last line in the above screenshot, starting elastic with the network host set to 0.0.0.0 error'd out, in my case I am only using one Elastic node.
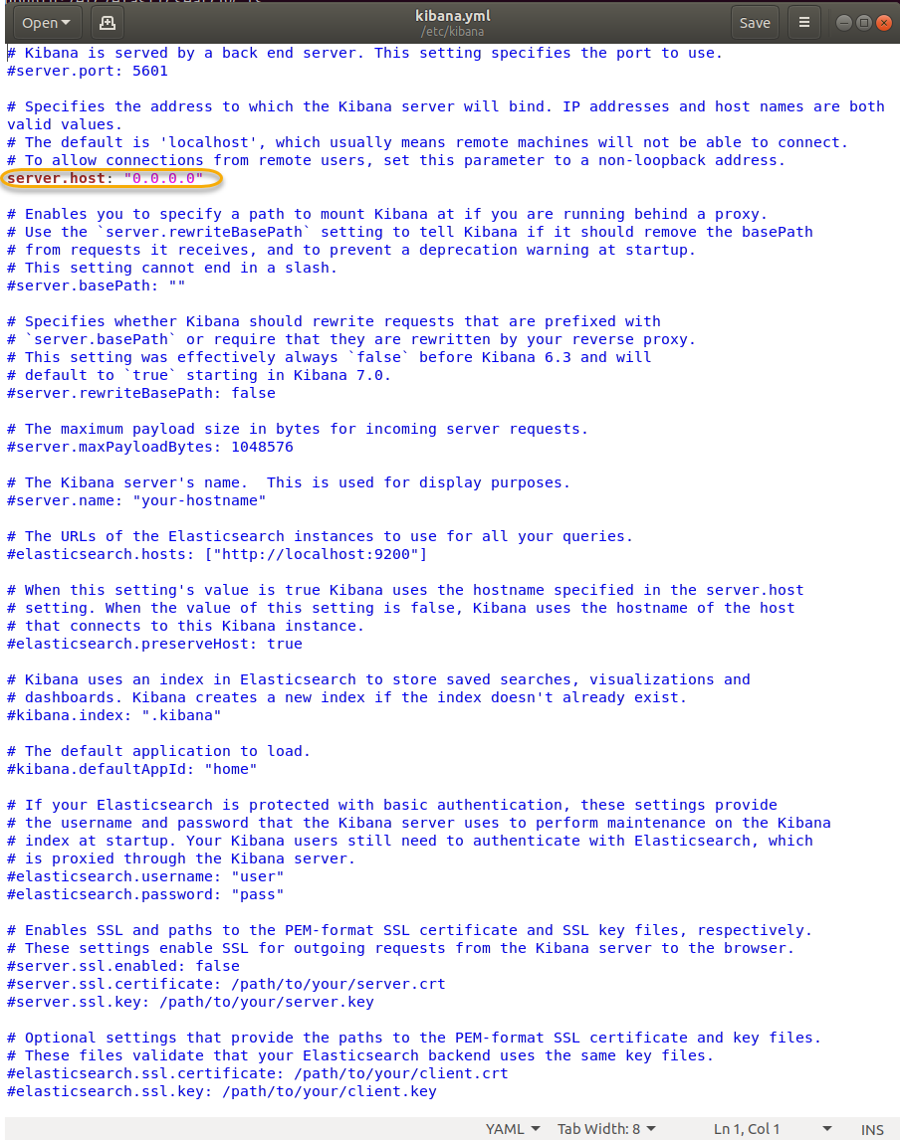
I had to make a similar teak in the Kibana configuration file:
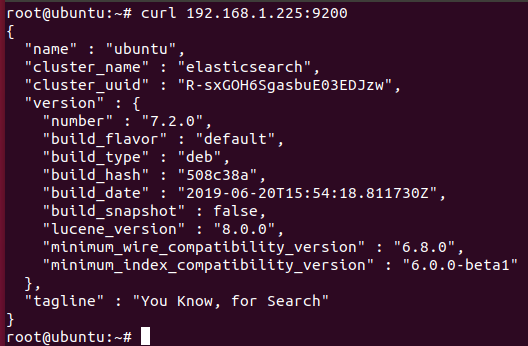
If all works well, you should see similar Curl output (Note that I am not using localhost or 127.0.0.1 as the IP, if the curl command works with the actual IP of the box you're hosting Elastic on, then the beats should have no issues connecting):
At this point you should have Elastic and Kibana up and running, now let's get the beats installed.
The following page has links to all the beats shippers you would need: https://www.elastic.co/guide/en/siem/guide/current/install-siem.html
In my case I'm only using Winlogbeat + Packetbeat
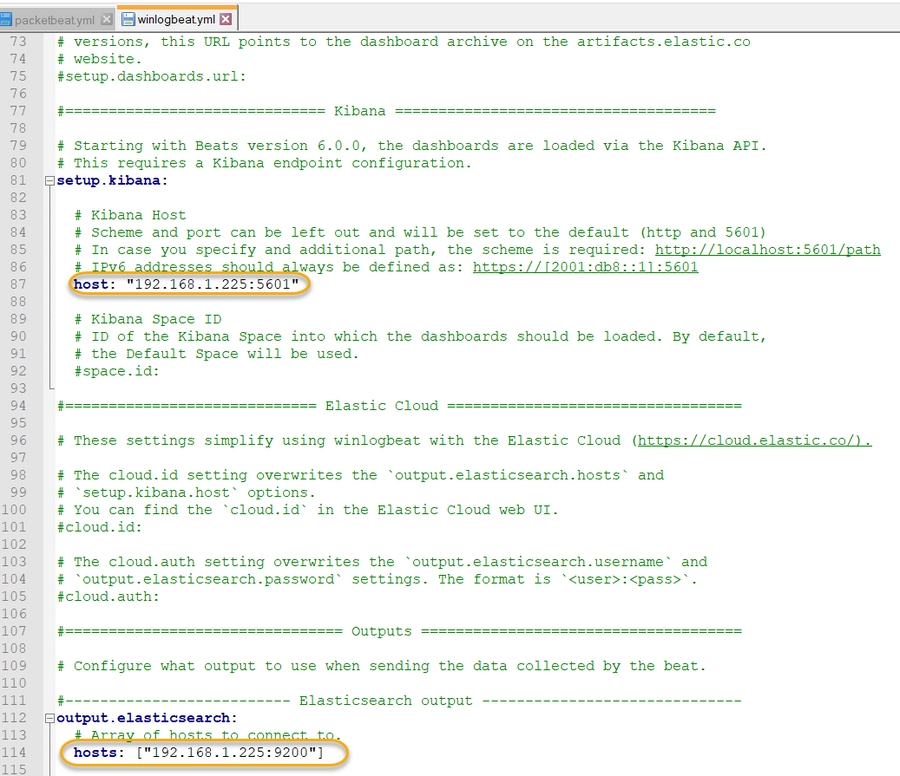
Here is what the relevant sections of my winlogbeat.yml look like:
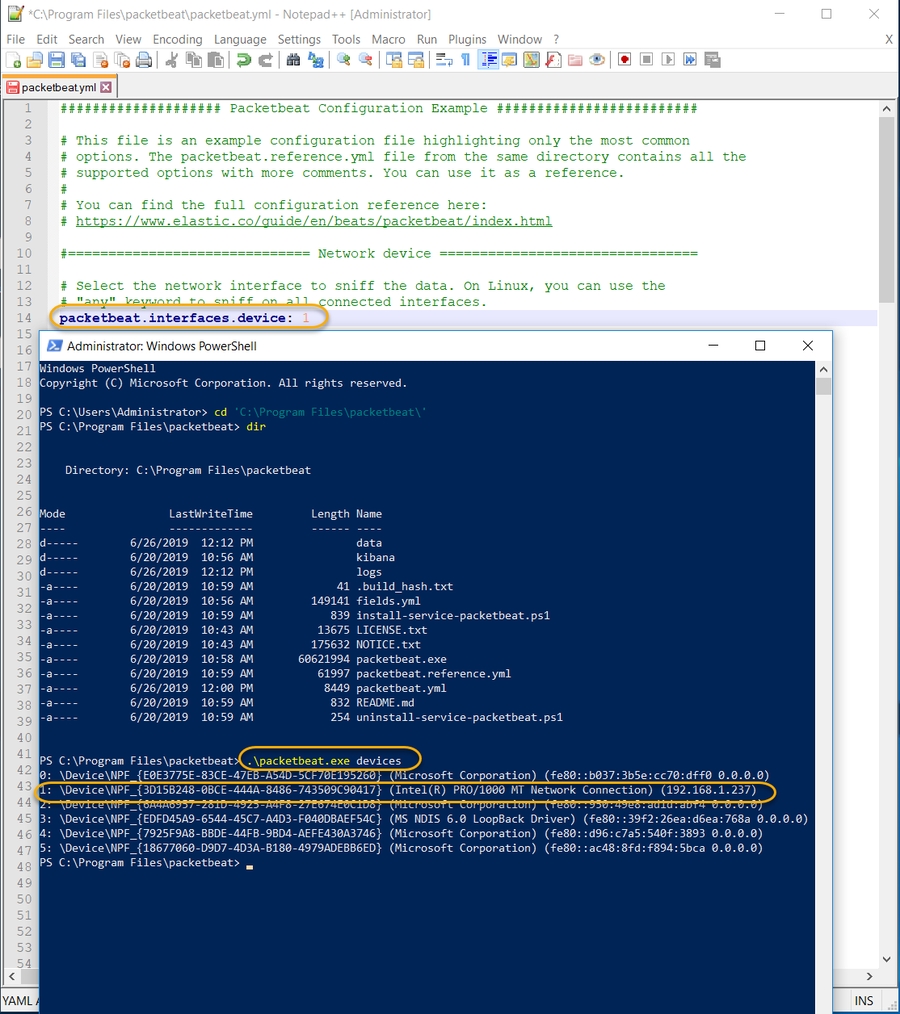
If you are installing packetbeat on a Windows host, make sure to grab WinPcap first, then follow the relevant instructions for set up. One thing I noticed with packetbeat is that if you are executing packetbeat.exe in a PowerShell window as per instructions, it sometimes doesn't display errors, if you run it from a standard command prompt, it will spit errors out on the console window.
Also, make sure you are selecting the right network device for packetbeat to sniff from:
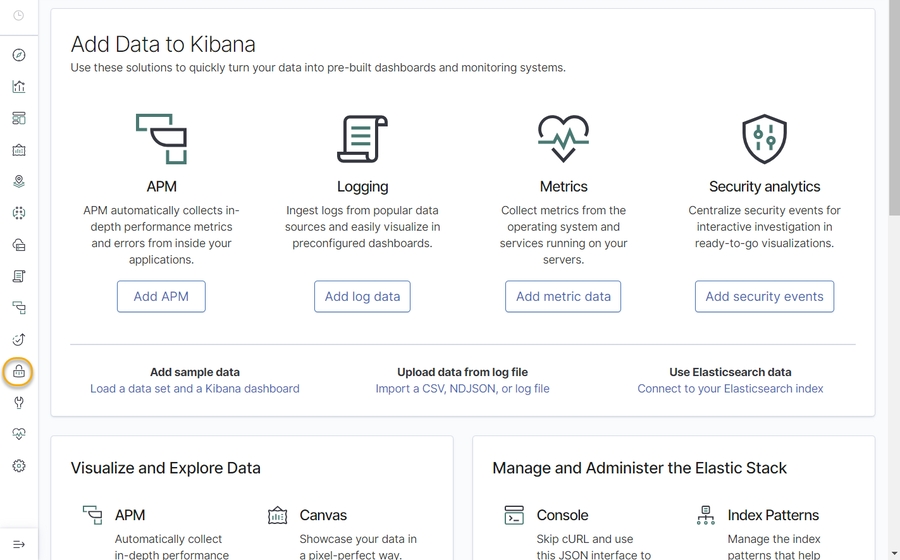
Now for the good stuff, assuming you have Elastic, Kibana and your beats set up correctly, you should be able to browse to: :5601 and you should see a home page similar to the following (The SIEM optioin is highlighted in yellow)
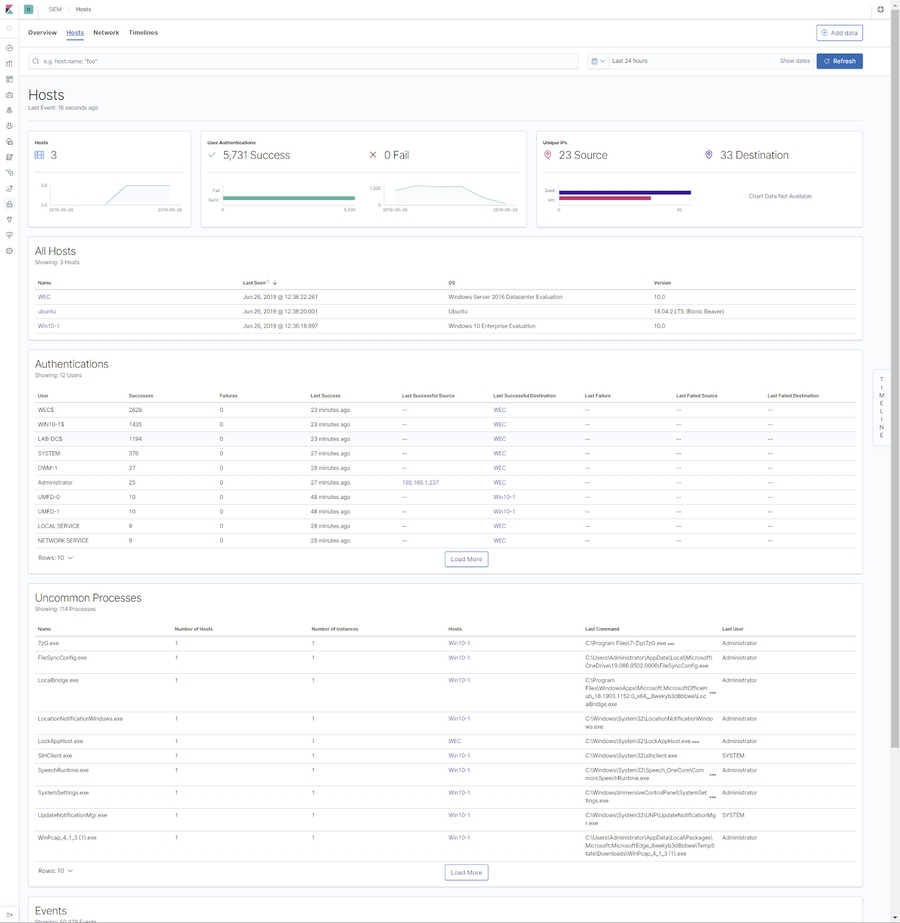
Here is what my "Hosts" page looks like:
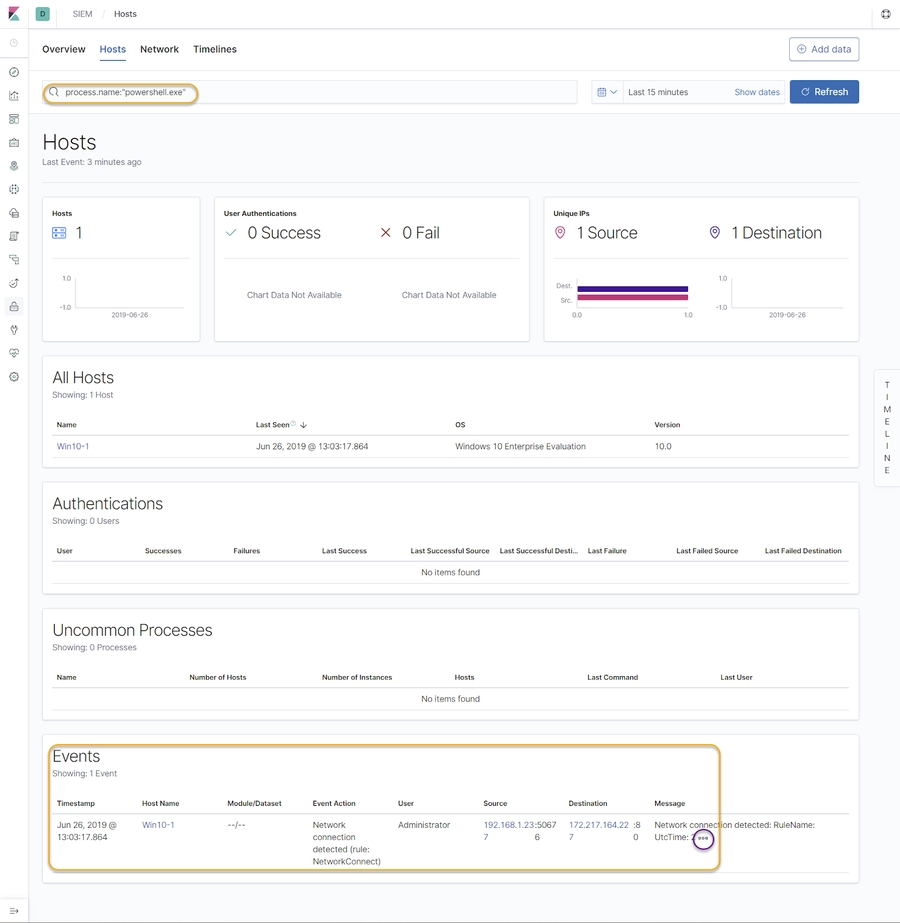
Now let's look for some simple events, you can use the search bar at the top to input your query. On one of my test machines I just ran:
Invoke-Webrequest www.google.com
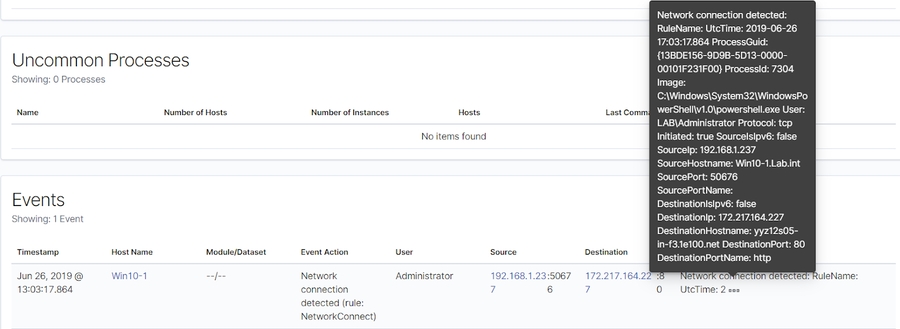
In the below screenshot, I'm trying to find that event in the Sysmon logs:
If you hover over the three dots in the Events table, you can see the full event details:
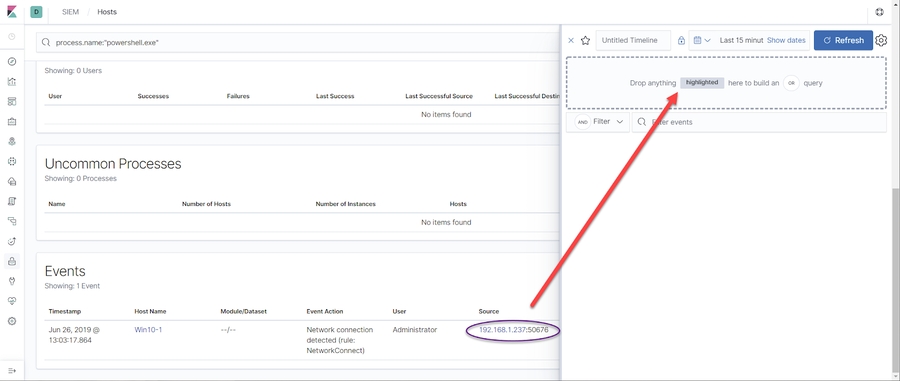
Now let's use this event to dig a little further using the timeline on the right hand side
When you click the timeline text, a menu pops up and you can drag and drop data to the timeline:
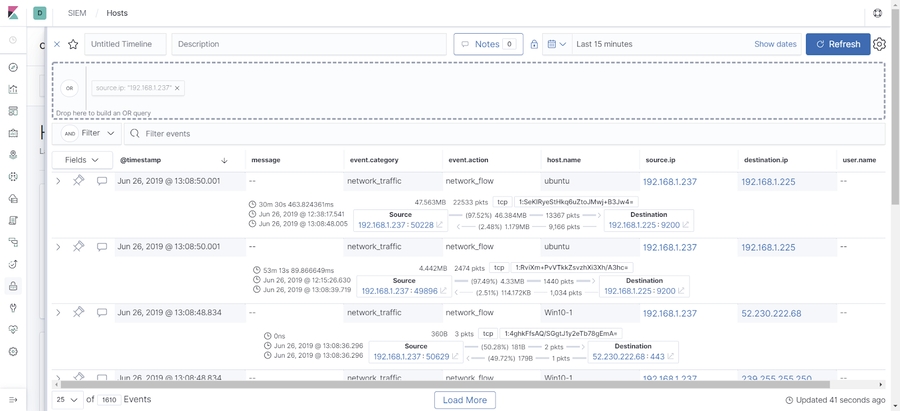
This gives us a timeline view, using our source IP as a filter:
From here you can pin events, filter further down and view the raw JSON. Let's filter our events down a little further, you can build reasonably complex queries pretty quickly using drag and drop. The GUI here is really intuitive.
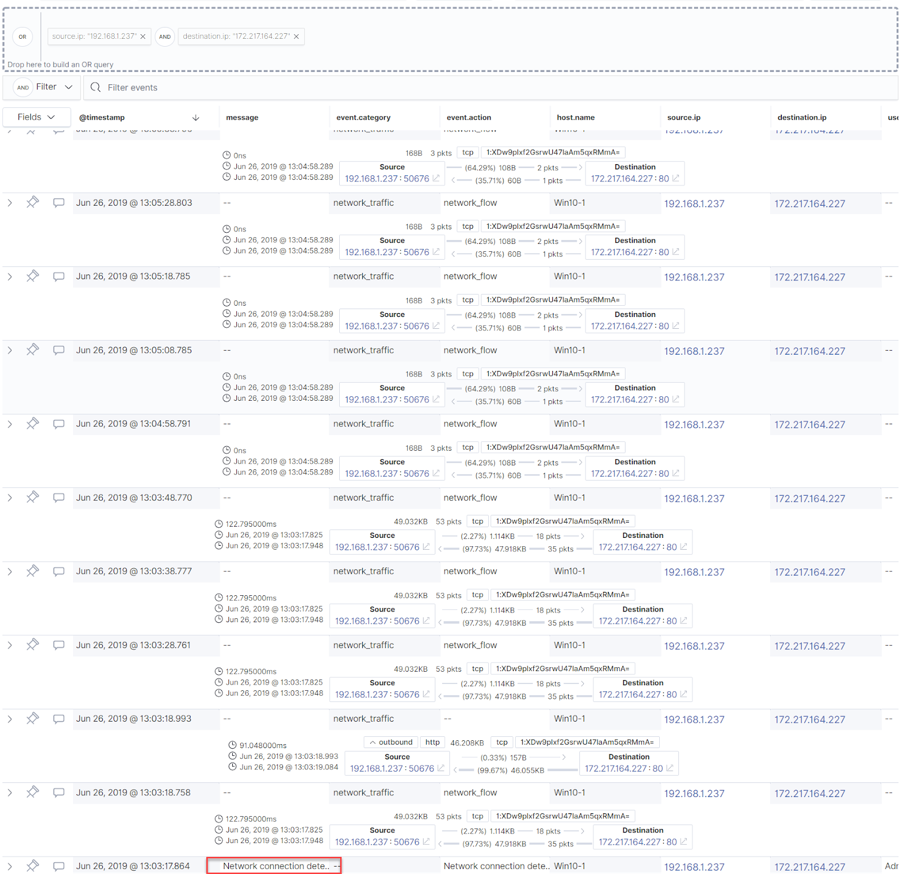
Let's go back to our PowerShell example via the timeline, this time I'm putting in the source and destination IP from our previous query into the timeline:
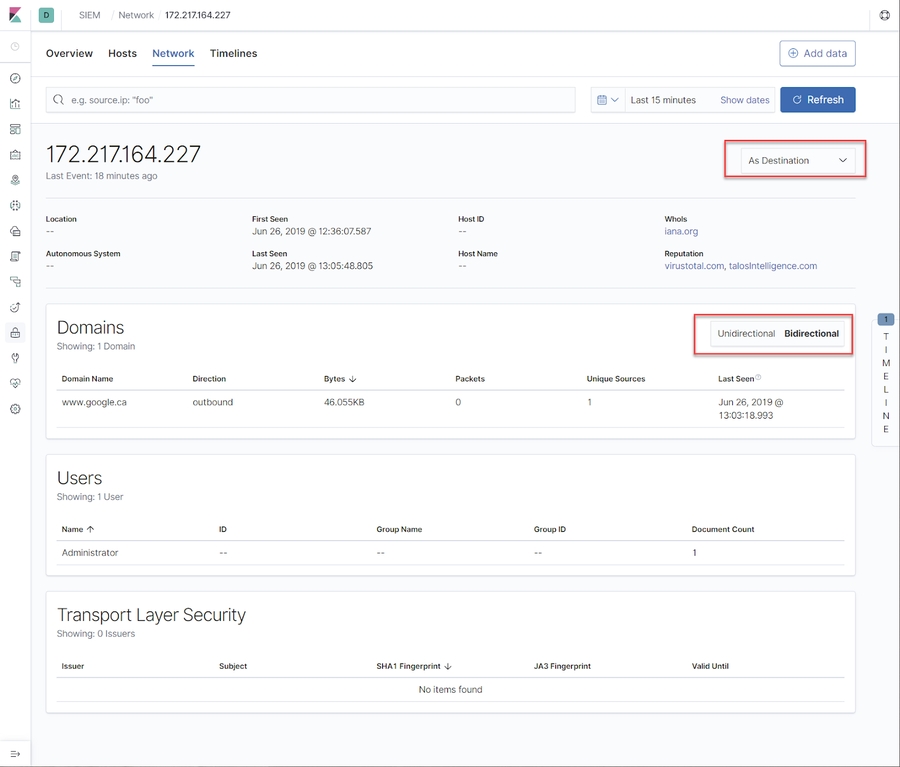
If we look from the bottom up, we can see that a NetworkConnect Sysmon event was detected, followed by some TCP traffic, we can pivot off the destination IP for more info, clicking the IP hyperlink within the timeline brings us to this window:
Here you can tweak the dashboard to show the IP as a source or destination.
In the above, we can see the destination IP was google.ca so we know that PowerShell connected to Google.ca
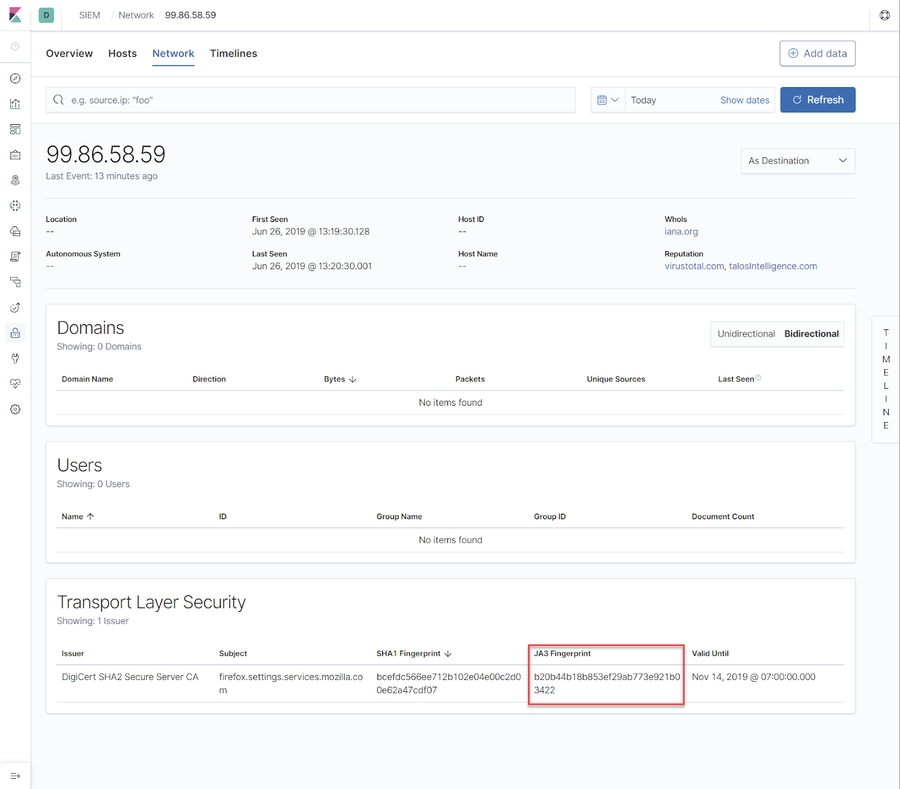
Elastic SIEM also supports JA3 hashes, so if we look at an IP that established a TLS connection we see the following:
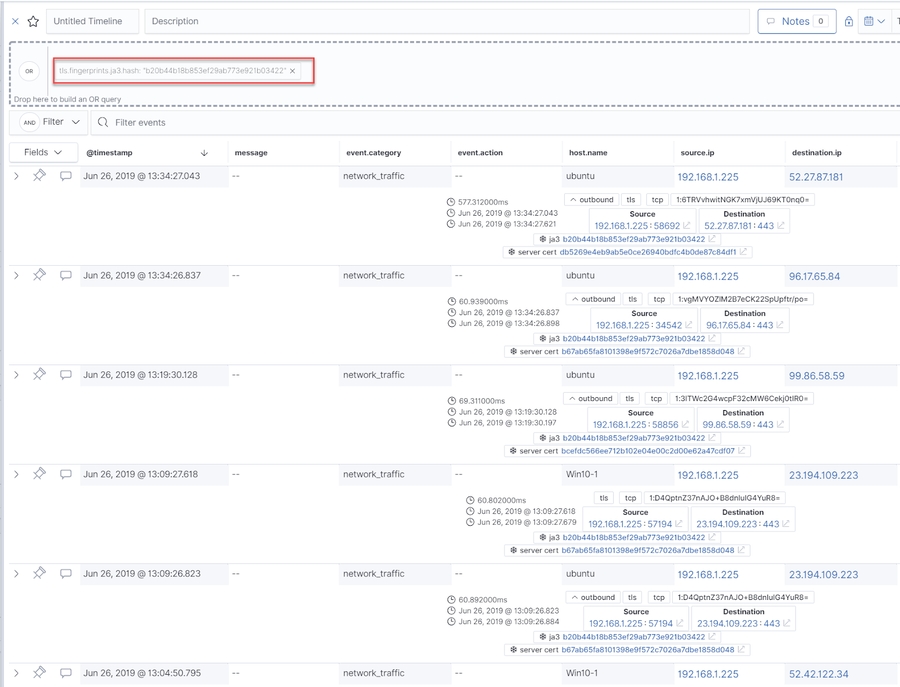
Again we can use the timeline to drag the JA3 element to it, to see what other systems may have established the same TLS handshake:
Hopefully this post helped demonstrate a really basic set up with the new Elastic SIEM. I'm sure I've hardly scratched the surface for what's possible.
Last updated
